Pages

Showing posts with label Classroom Makeover. Show all posts

Sunday, May 4, 2014

HOP TO A MORE ORGANIZED CLASSROOM

With summer approaching, the list of things I want to do this summer to become slightly more organized is growing quite quickly. …and I have a feeling this Spring Clean-Up Blog Hop is going to inspire me to add a few more things to that list.

SpringCleanUpHop
Creating a Spectacular Substitute Binder lived on that list of things to do to become more organized for years.  It had always been something I wanted to do; after all, I think we can all relate to this…

TeachingSick
…but I just never got around to it.  Whenever I was sick, I would find myself frantically typing up the basics, emailing them in, and hoping for the best.

This fall, I went for it.  I made the Spectacular Substitute Binder that has allowed those miserable mornings of panic to be slightly more manageable.  Check it out!!

SubstituteBinder.1
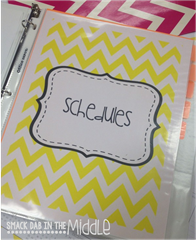
SCHEDULES
SubstituteBinder.3SubstituteBinder.4

PROCEDURES
SubstituteBinder.9

CLASS LISTS
SubstituteBinder.6SubstituteBinder.5

BEHAVIOR MANAGEMENT
SubstituteBinder.7SubstituteBinder.8

LESSON PLANS 
…my lesson plan section is a little lacking.  This summer I am planning to fill it with emergency plans and activities that can be used at any moment.  While I still have to type up a quick plan when I am unexpectedly sick, knowing this binder is sitting ready on my desk puts my heart at ease!  …and having this sheet in the inside cover of the binder often encourages my substitute to actually leave behind some feedback about the day.

SubstituteBinder.10SubstituteBinder.2

Ready to make your own?!  Get your Editable Spectacular Substitute Binder [here].

Be sure to enter the Rafflecopter for your chance to win a HUGE Teachers Pay Teacher gift certificate!!

. a Rafflecopter giveaway
Hop to Learning in Progress for another Spring Clean-Up Tip!

HopToTheNextStop


Monday, March 31, 2014

FILING CABINET UPCYCLE

Brought to you by Popular Demand: Fabulous Filing Cabinet DIY Instructions


…if you need a Spring Break project, this is it!!

DISCLAIMER: I am a messy crafter. To say there was spray paint everywhere is an understatement. I recommend drop cloths. Many of them. Covering everything.

1. Remove the drawers of the filing cabinet. (I eventually covered the drawers with fabric so I did not even bother to clean them or paint them.) Clean the filing cabinet using a clean rag and denatured alcohol.

2. Lightly scruff the filing cabinet using a 3M AutoBody Scruff Pad RED and then wipe down a second time using denatured alcohol.

3. Before spray painting, use a tack cloth to clean the filing cabinet one last time. Then, spray away. (I have no painting suggestions. The first filing cabinet I painted was the first time I had used spray paint. Just go with it. I used about four cans of spray paint on the four-drawer cabinet, and probably could have used one more.)

4. While the spray paint is drying, remove the hardware from the front of the drawers. (On the two-drawer, I was able to remove all the hardware which made covering them with fabric a piece of cake. The four-drawer was a little tricky. I couldn't get the sliding tab that you use to open the drawer off, so I had to slit the fabric and get creative.)

5. Once the drawers are hardware-free, go to town with the ModPodge. I put down a heavy coat on the drawer and around the edge of the drawer before laying down the fabric. (I used fabric quarters and left them full size.) Once the fabric was in place, I focused on making sure the fabric adhered to the edge of the drawer by putting a coat of ModPodge on top of the fabric and around the edges. I then cut down the fabric to size by trimming around the wrapped edges. …I repeat, I am a messy crafter. There was ModPodge everywhere. I just kind of went for it.

6. After each drawer was covering in fabric, I went back and put a second coat of ModPodge down to “protect” the fabric and, hopefully, create some durability.

7. When the fabric was dry, I used an xacto knife to cut through the fabric and create holes where I needed to be able to reattach the hardware.

Fabulous Filing Cabinet complete.